How to:
Encapsulate your own placenta

Step by step guide for encapsulating your own placenta
If at any point, this feels intimidating, please consider hiring a professional to do this. Emily has a list of professional placenta encapsulators that will complete this service, including pick up and drop off in your home. The cost is often around $250-$300 and includes pills, a tincture, cord art, and prints.

Step one: Clean Your Kitchen and Prep all Supplies.
It’s important to start off with a clean area and clean supplies. Everything you use (NOT the placenta!) will need to be washed and scrubbed thoroughly. Then rinse and soak in a 5% cold water bleach solution. Rinse thoroughly afterwards and allow to air dry in a clean space. Nothing should have any bleach remaining afterwards.
You will need:
Two Chux Pads, gloves (if desired, otherwise clean your hands and nails thoroughly), sharp kitchen scissors or a sharp knife and cutting board, a dehydrator, freezer paper cut to the size of the dehydrator trays, bleach, brand new scrubbing tools, a pill machine, empty capsules, jars, 100+ proof vodka (if making a tincture), camera (if pics are desired), paint paper (if making prints), and a good blender.
You can cut the freezer paper into sheets that will line the cleaned dehydrator. I use the trays as stencils to mark and cut. Make sure to cut a center hole so air can flow freely.

Step Two: Get your placenta out
It should have been stored in the refrigerator or freezer before encapsulation. Thaw first if frozen.
You will need to:
Set out a chux pad on your clean counter. Make sure you have clean scissors or a sharp knife and cutting board out and ready on a clean pad. You should have the dehydrator ready with the freezer paper already lining the trays. If you will be making blood prints, have the paper out and ready also.
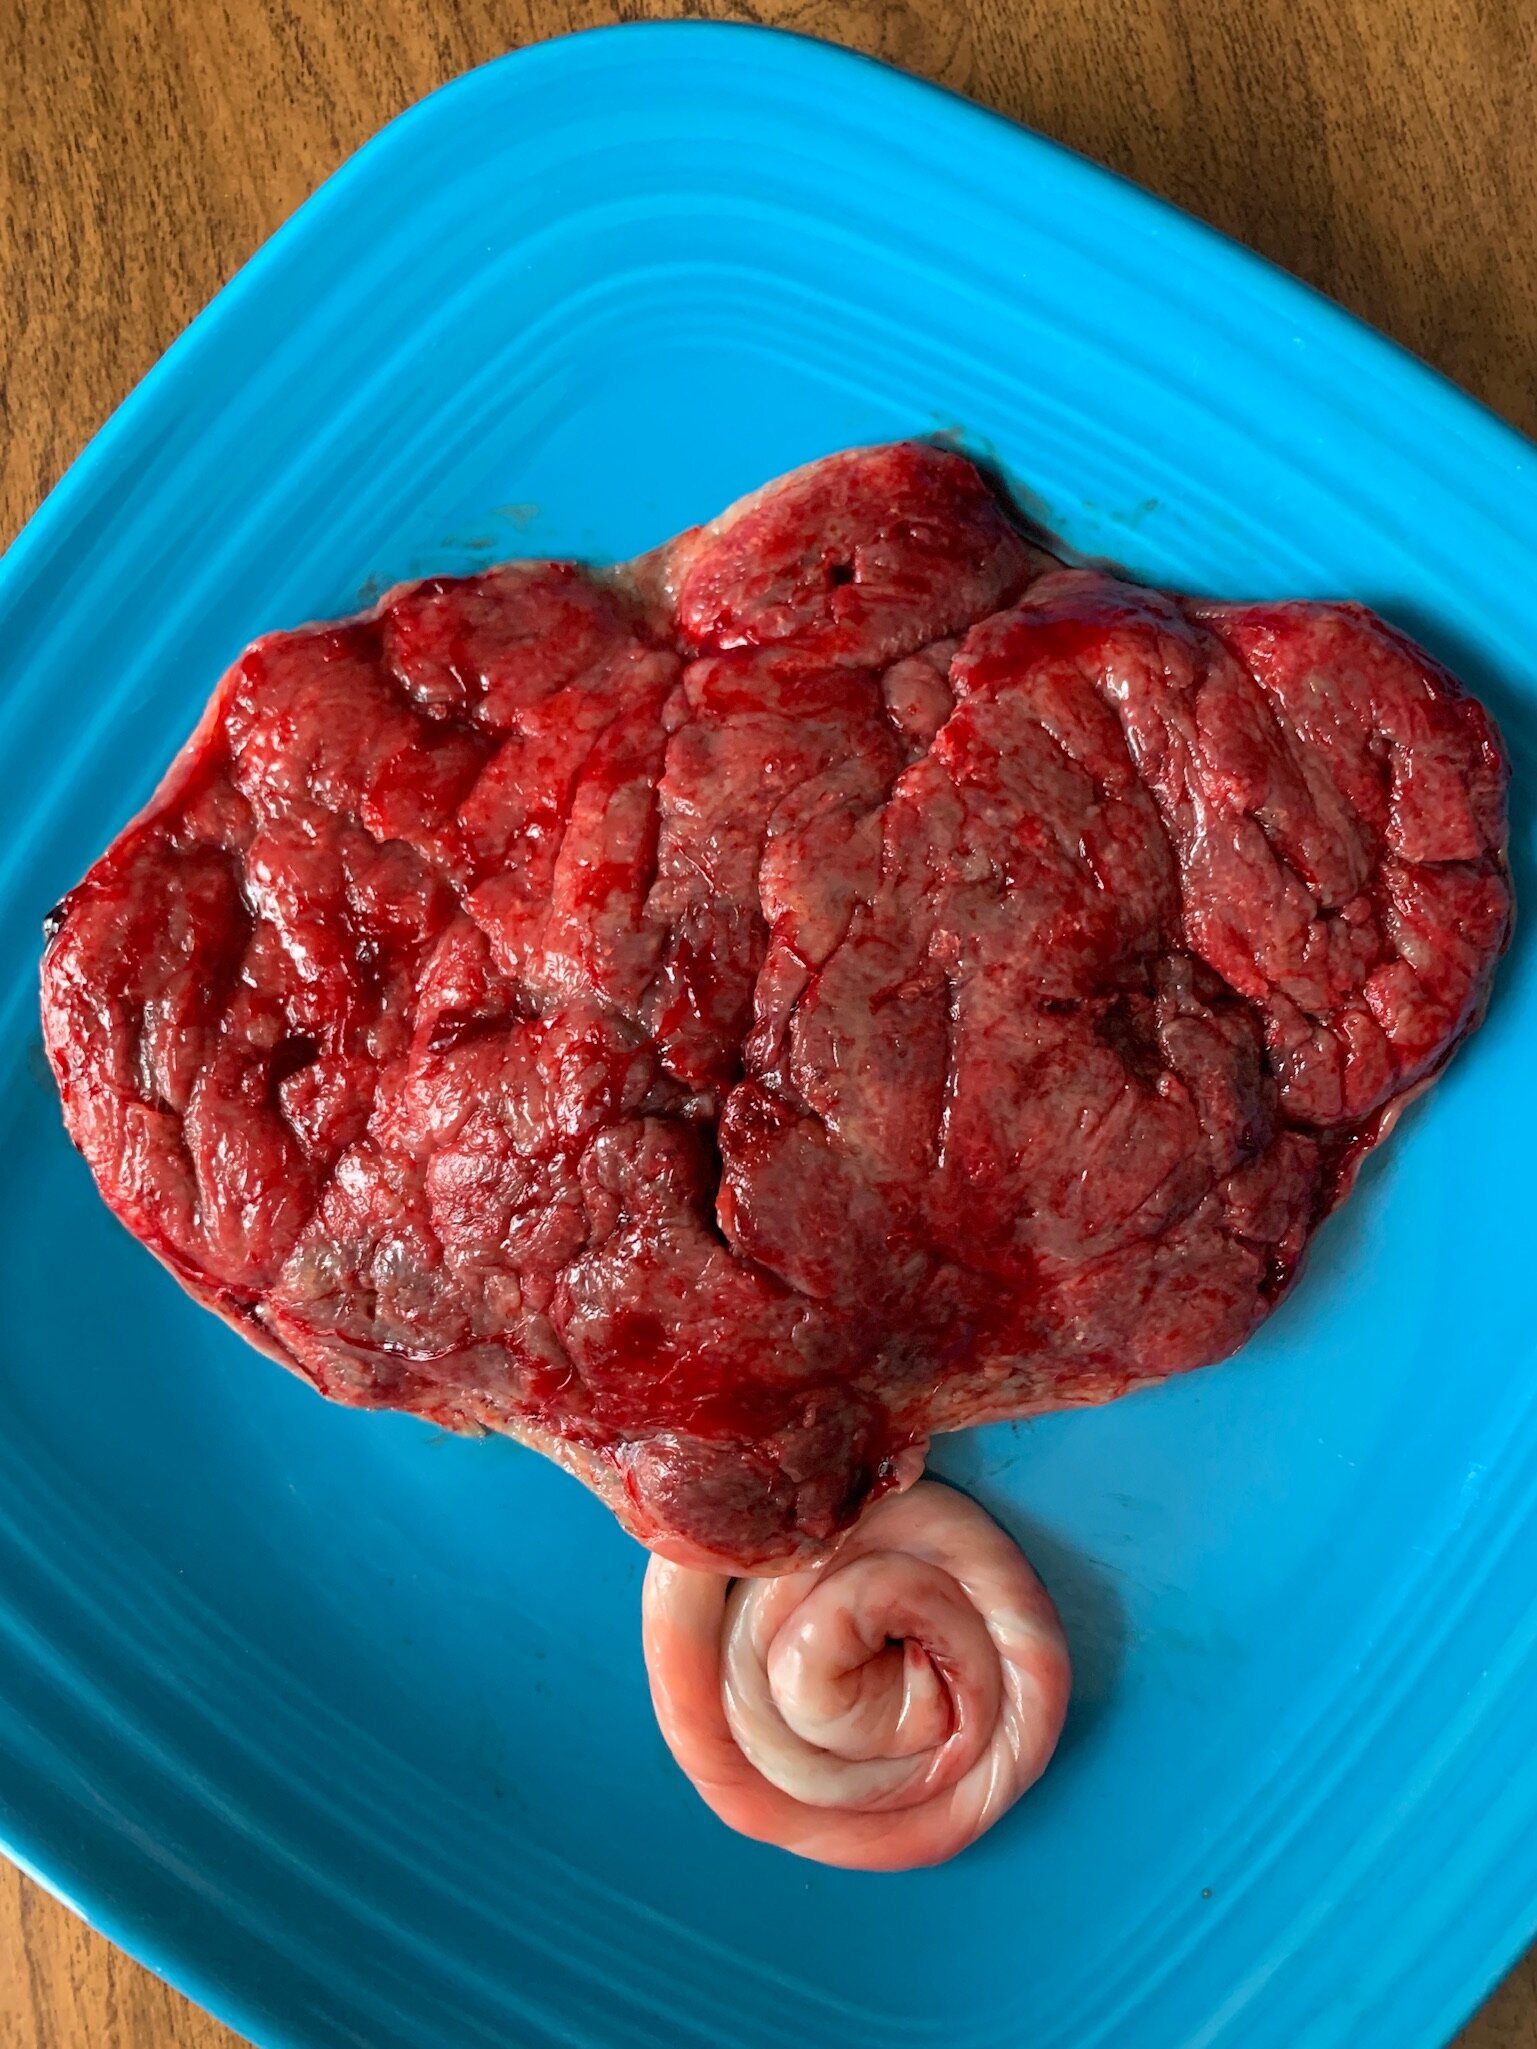
If you are going to take pictures of it, this your chance. Clean dinner plates make a nice background for photos when desired (example pics below).
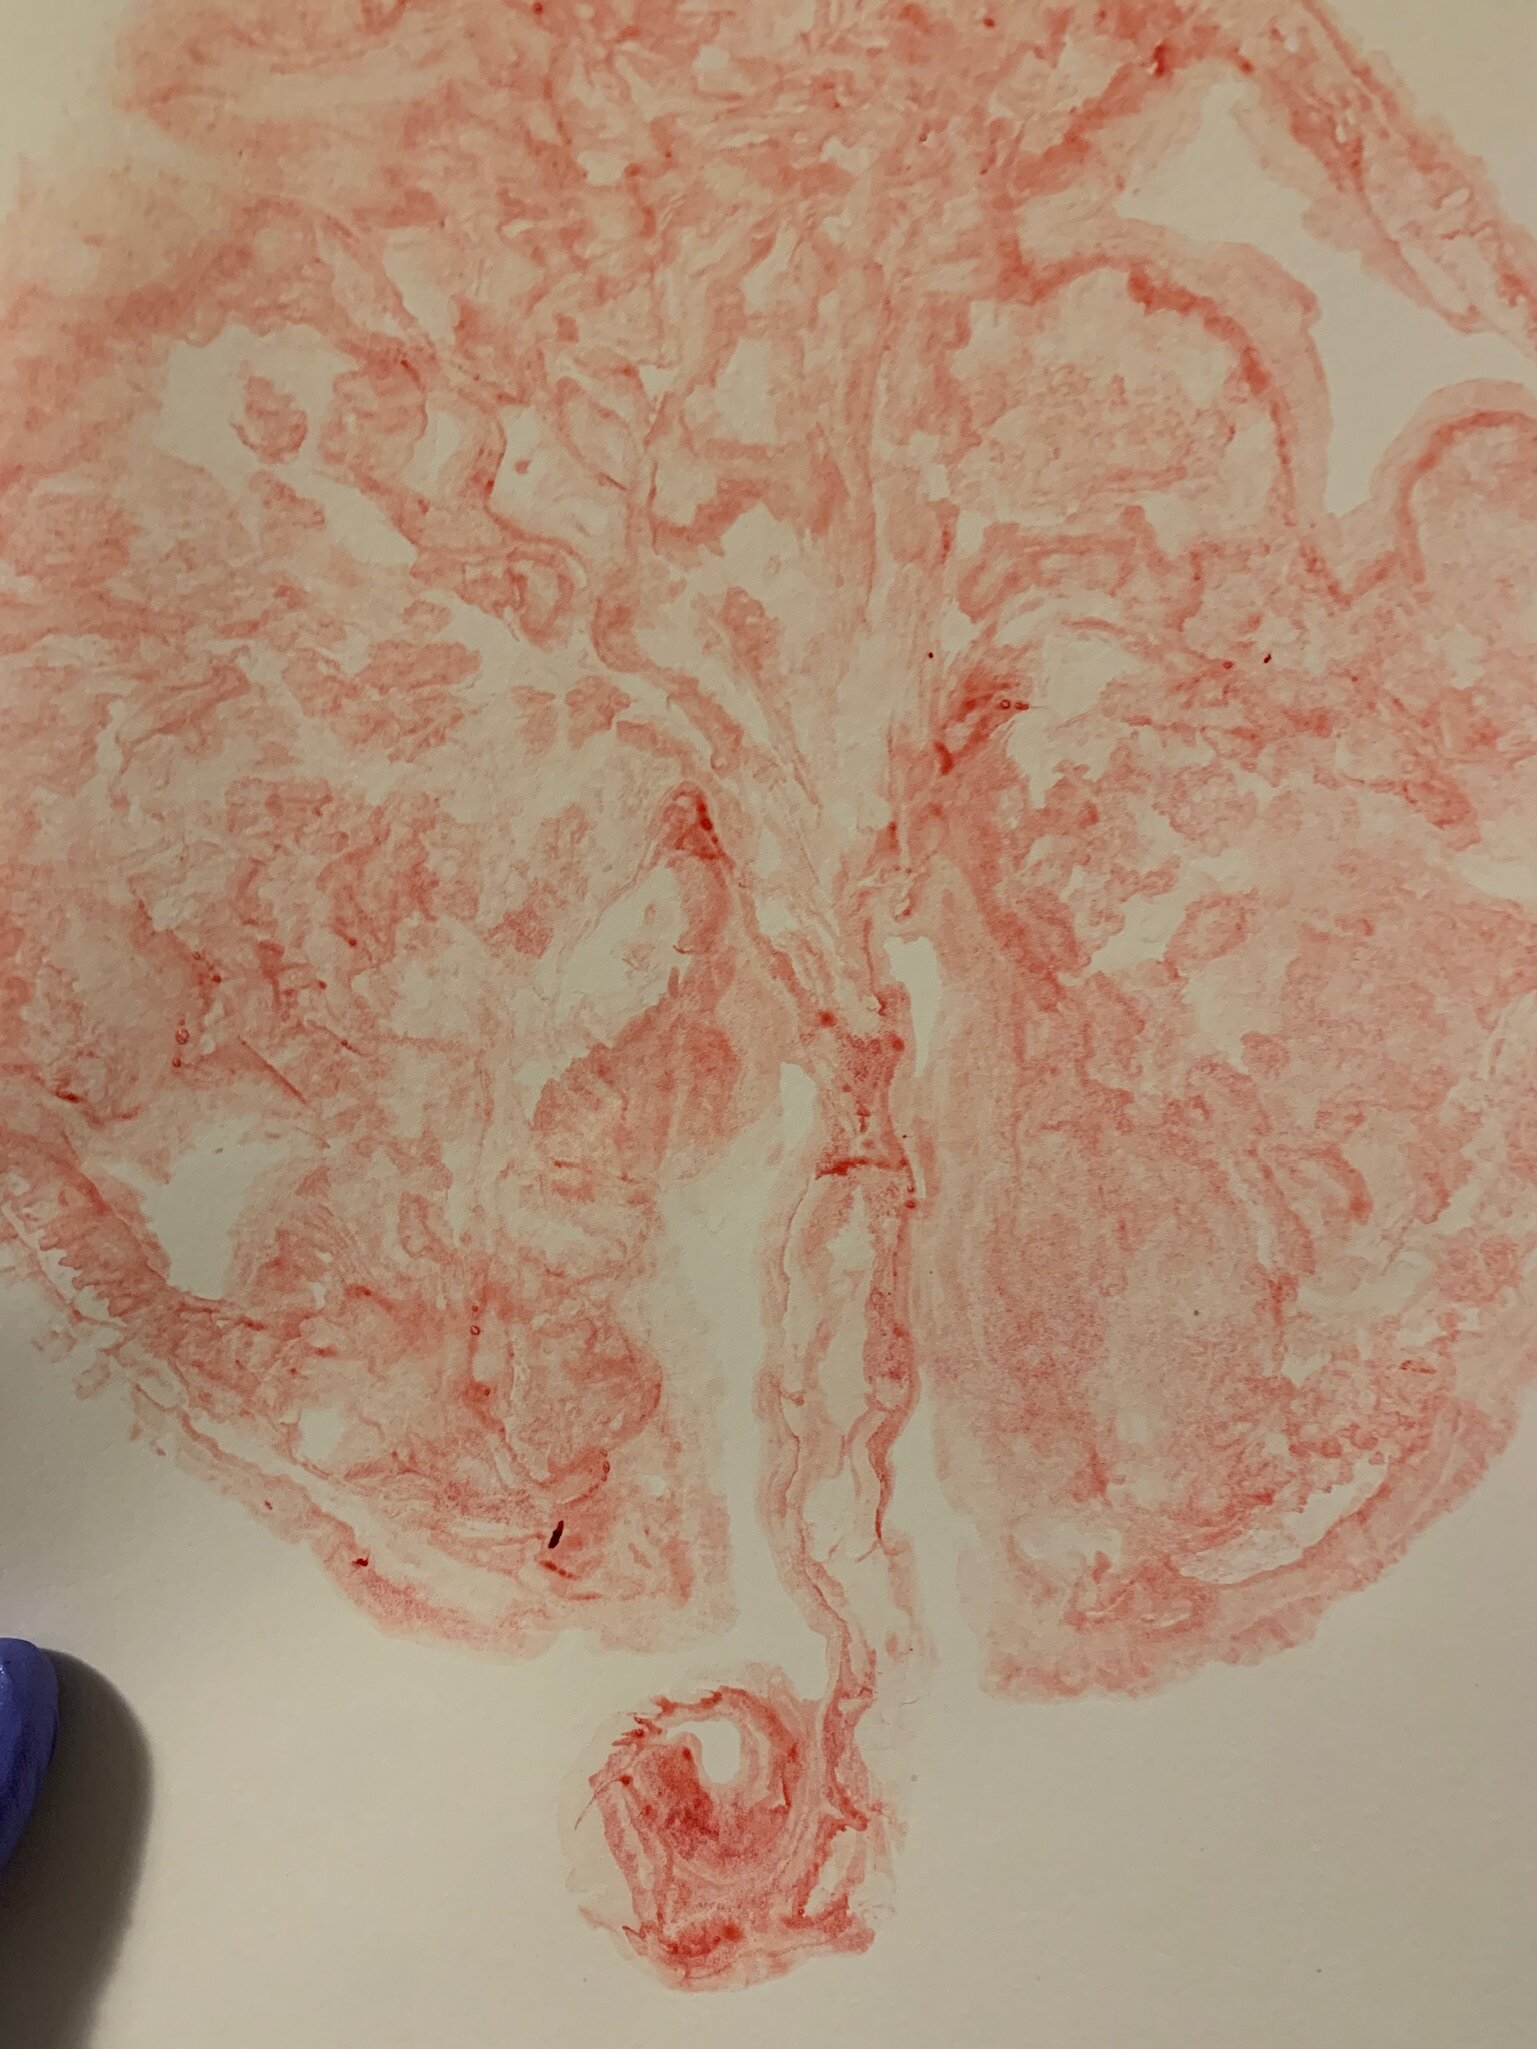
If you want to get blood prints at this time, pose the placenta the way you’d like it to be in the prints (as seen). Then, take the thick paint paper and lay it flat on top of the placenta. Carefully pat down the paper over the placenta to transfer the entire print before lifting the paper off. Allow to dry thoroughly before framing (example pics below).
Step Three: Prepping your placenta for the dehydrator
Once your area and the dehydrator are prepped and you have gotten photos and blood prints (if desired), you can get down to business.
You will need to:
Cut the umbilical cord off at the insertion site. Set that to the side.
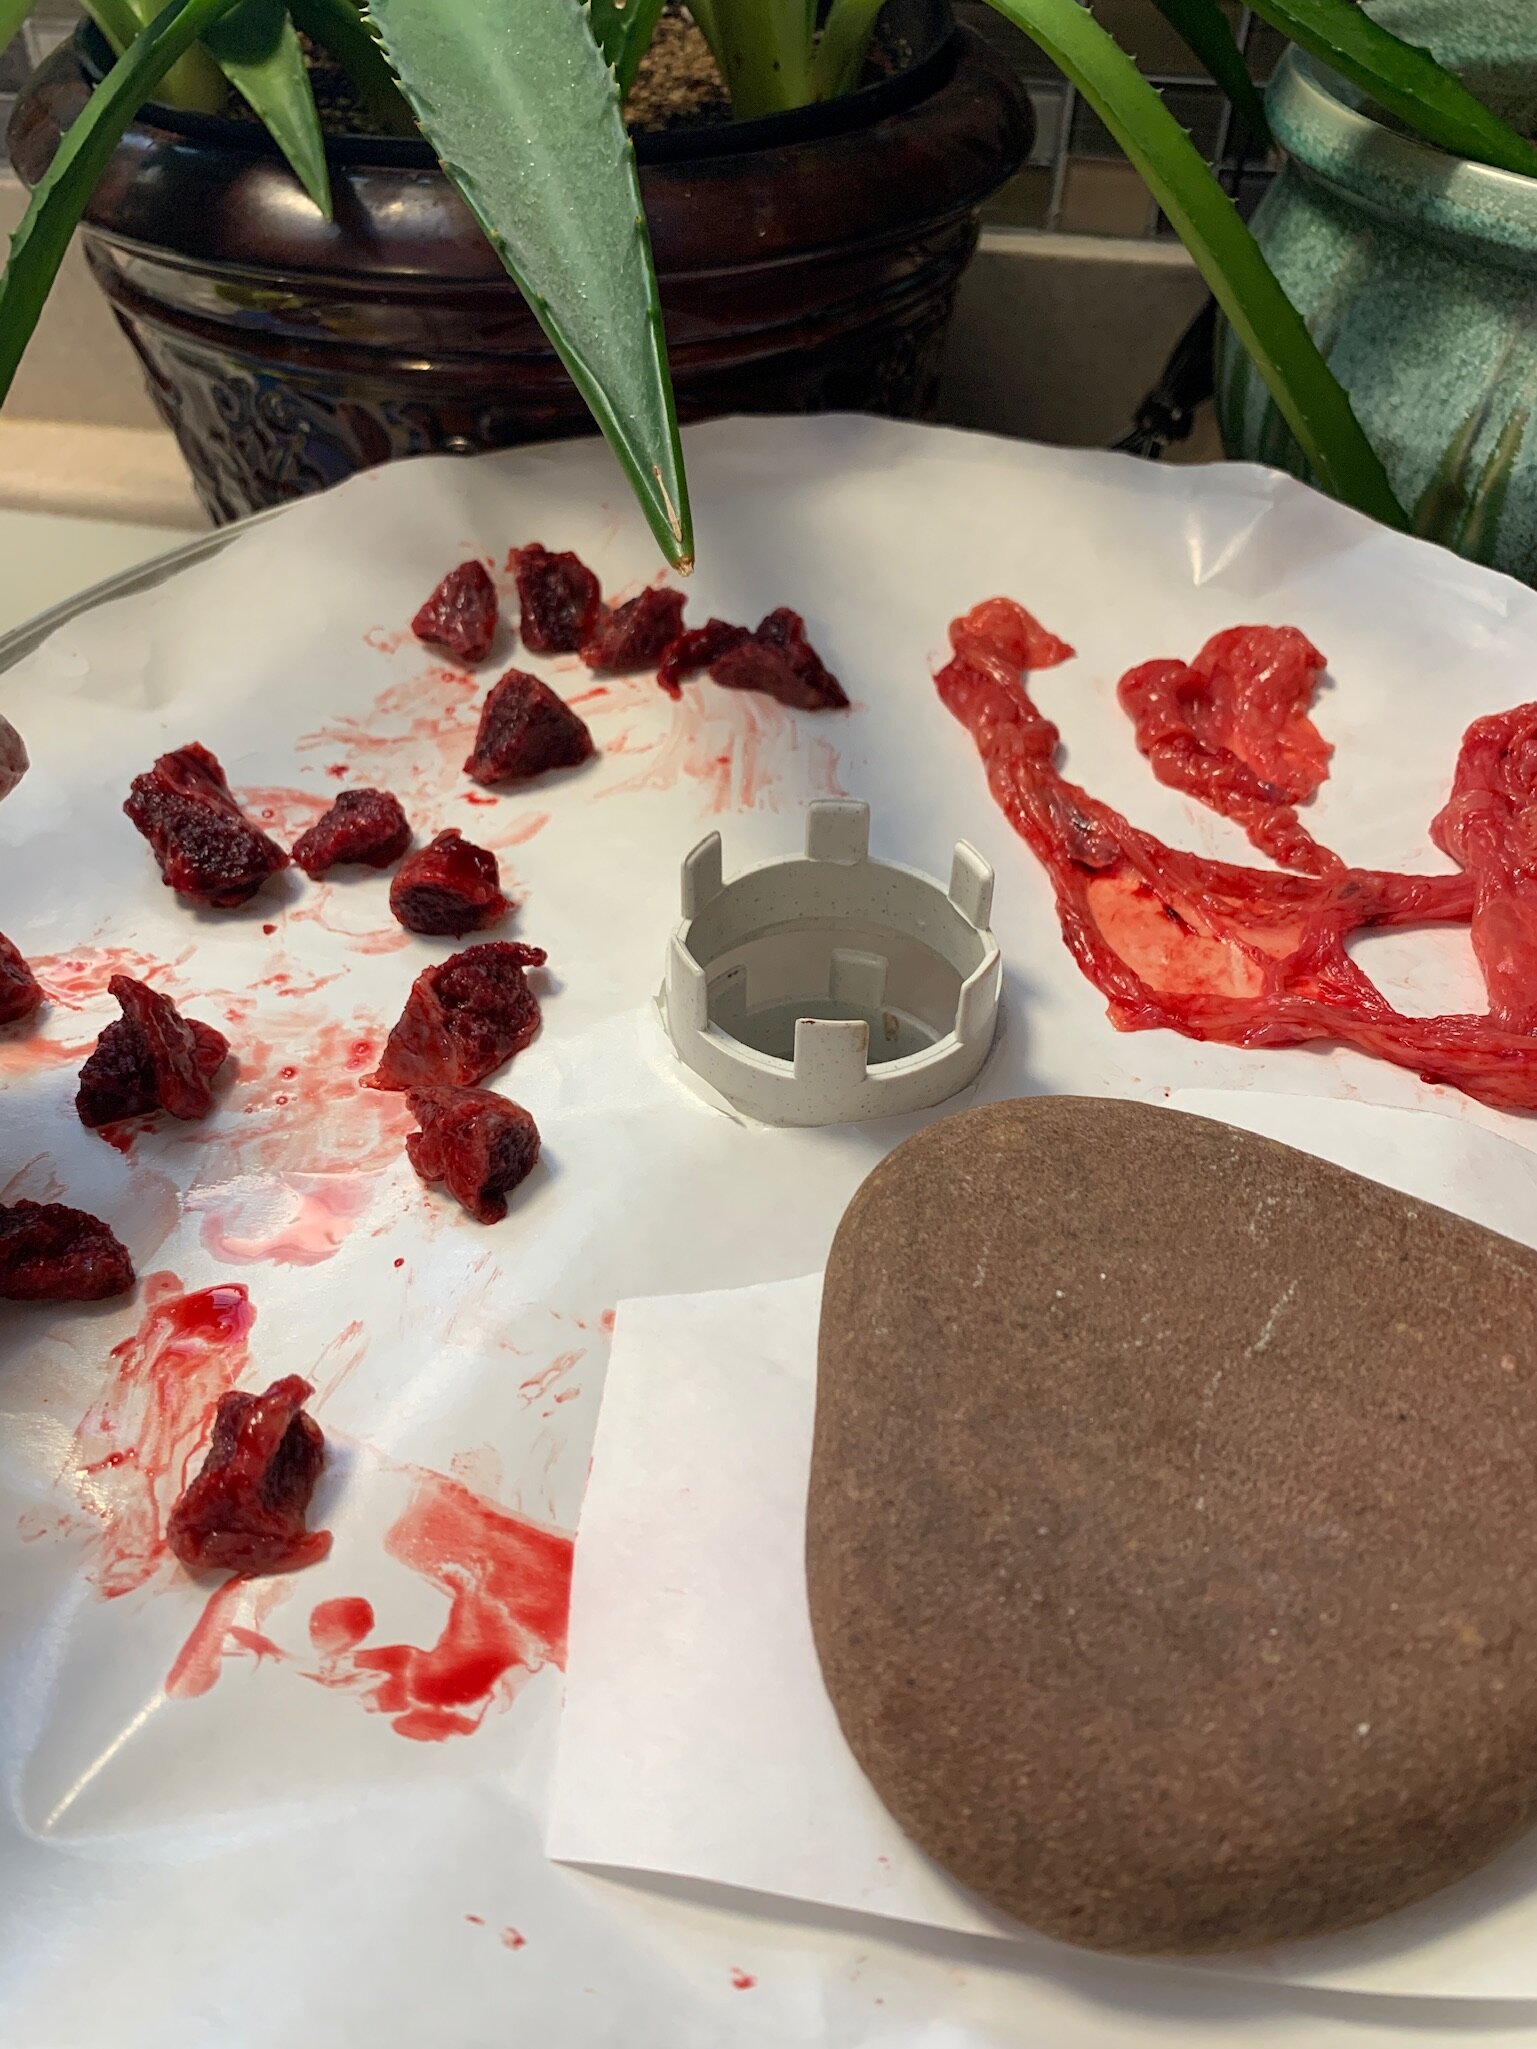
Now, cut the placenta up into 1 inch (or smaller) strips. Put them onto the freezer paper lined clean dehydrator trays, making sure to leave some space between them. Good airflow is critical. Use as many lined trays as needed. If you would like to save some to freeze for smoothies, this is the time to do that.
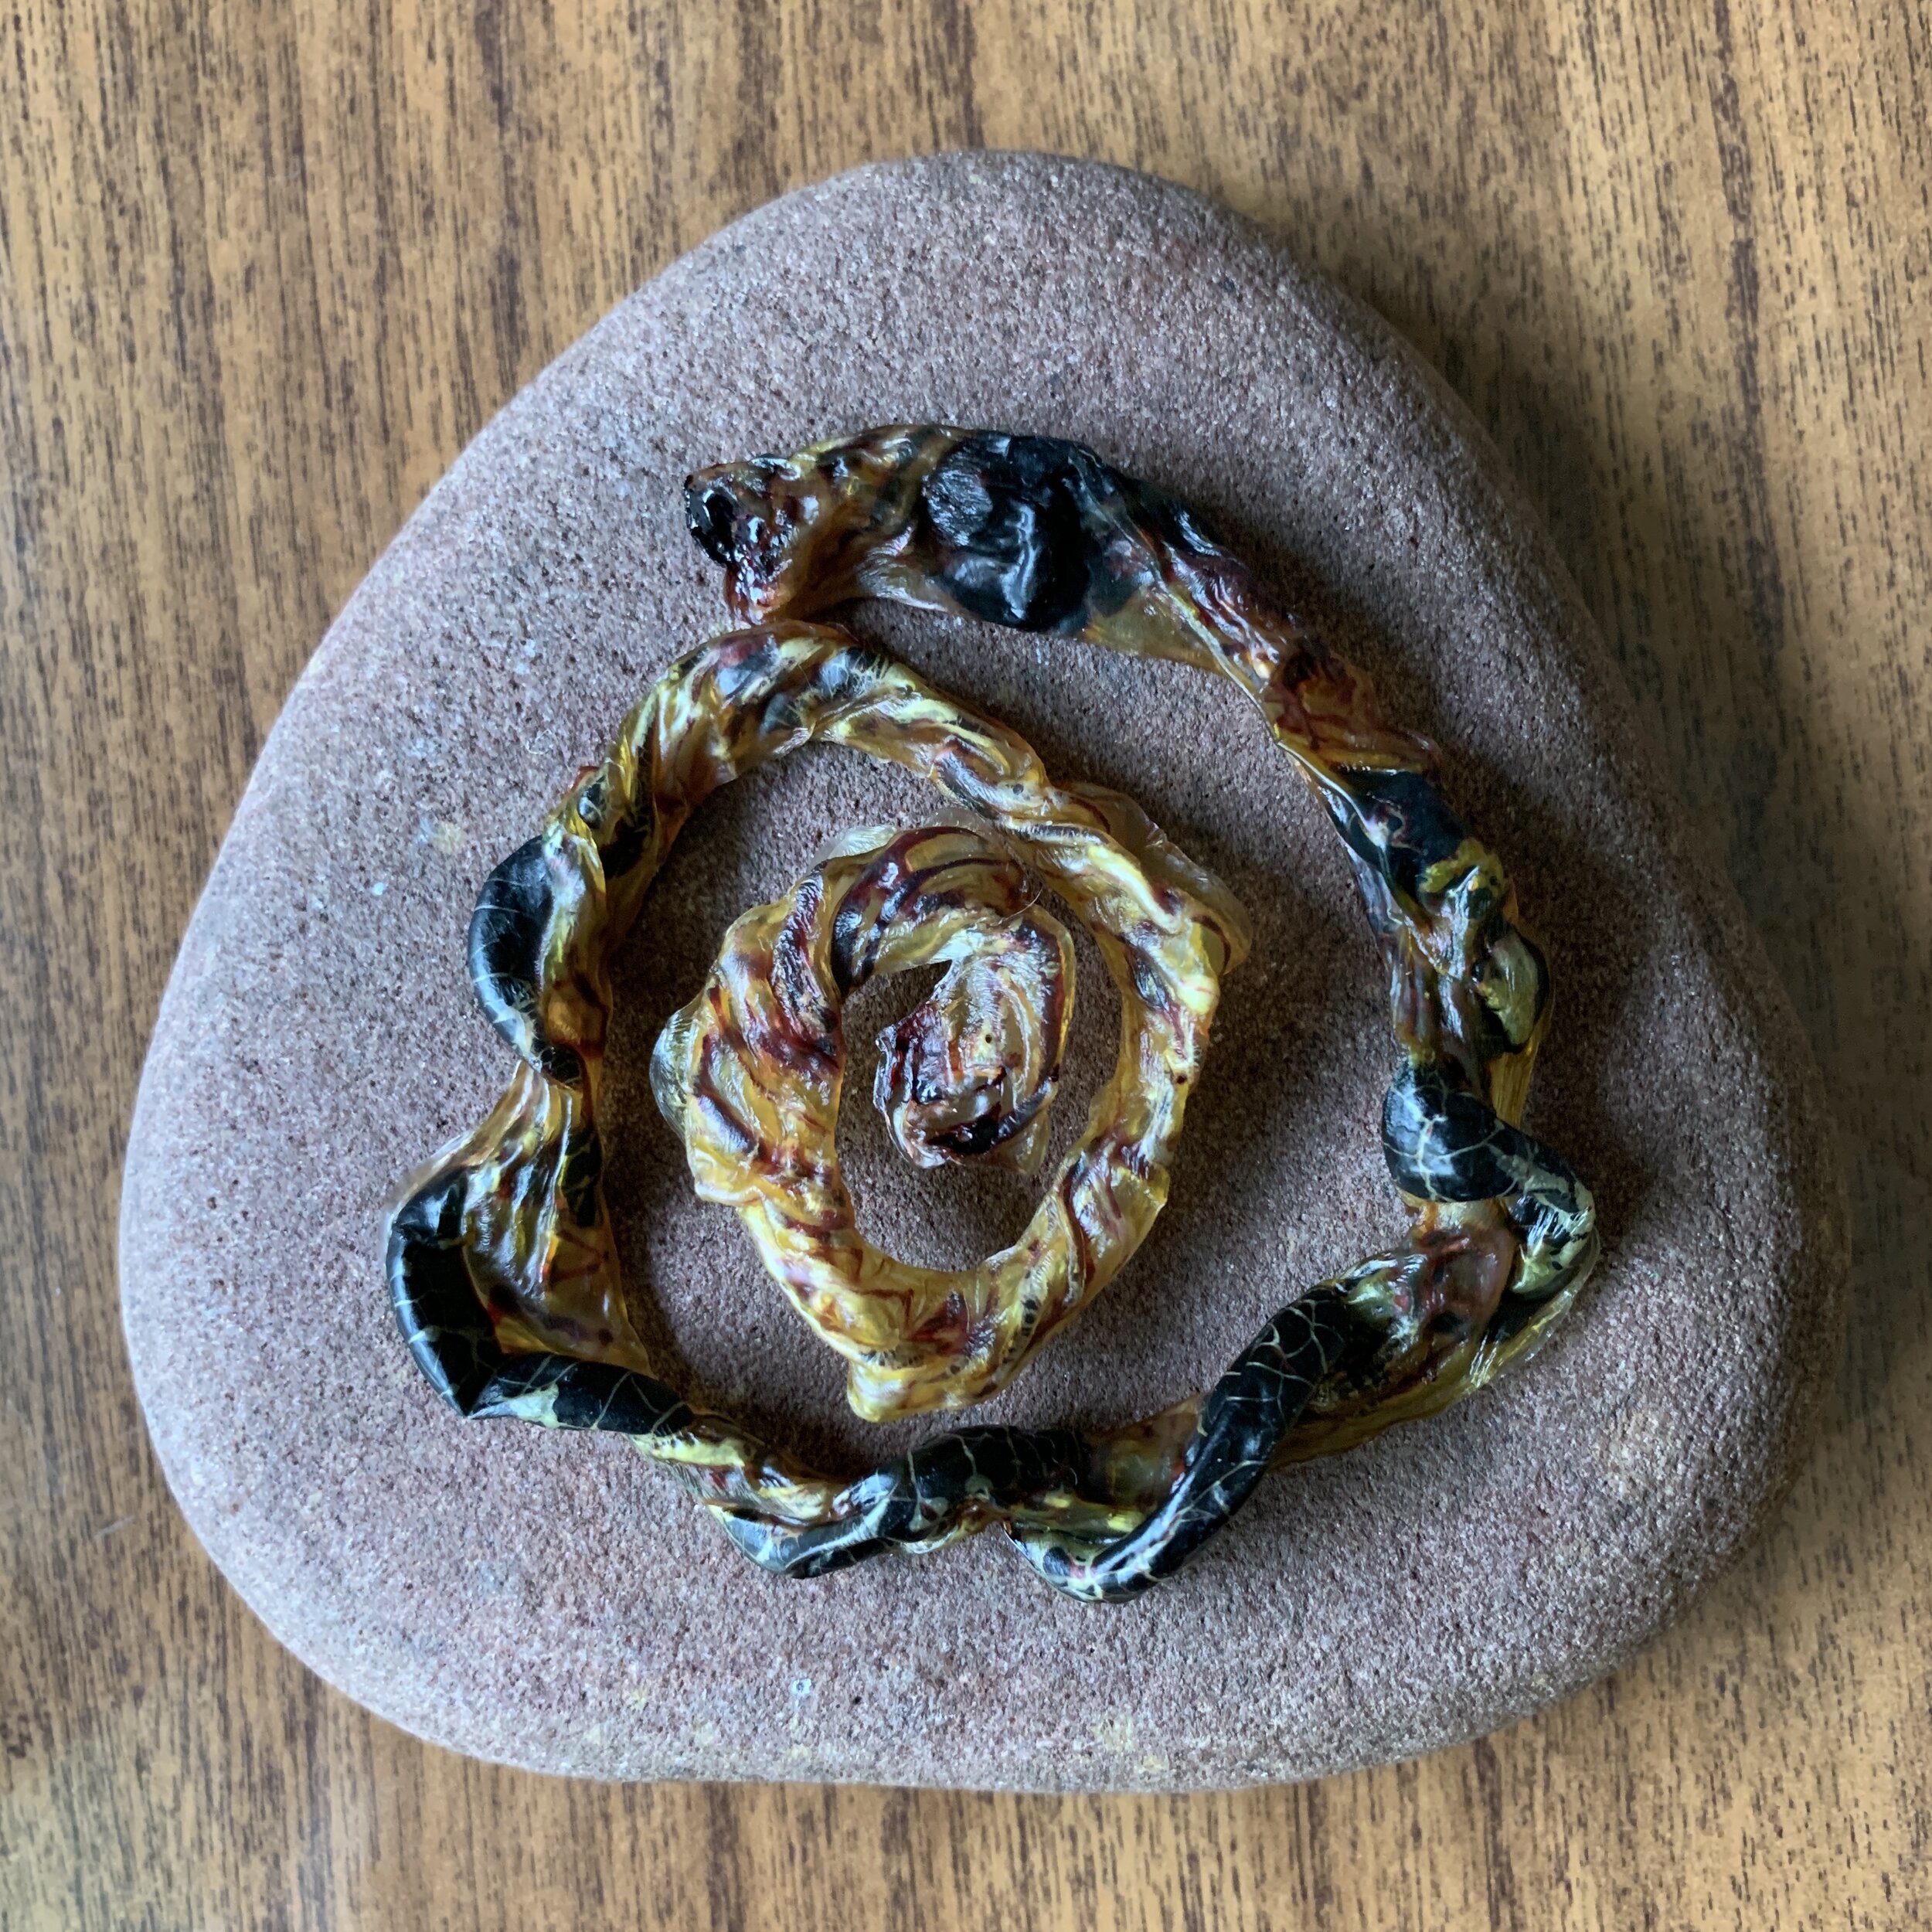
If you would like to make a cord keepsake with the umbilical cord, you will need to create a shape with it in an open area on a lined tray. Most make a sacred spiral or a heart. You will need to cover it with a small piece of freezer paper and lay a heavy, flat rock on top of it. Otherwise it will curl up and lose shape as it dries.
Now, put the lid on the dehydrator and plug it in. Set the dehydrator to the temperature you desire. It will need to run non-stop for a day or two.
Make sure to clean and sanitize all non-disposables at this time. Clean kitchen thoroughly and throw away and used disposable items appropriately. You are done for a few days. Yay!

Step four: encapsulating
Once the placenta pieces are THOROUGHLY dehydrated, you can turn the dehydrator off and prepare to grind and encapsulate the pieces. Put the cord keepsake to the side.
You will need to:
Have your clean and DRY blender ready.
If making a tincture, take 4-5 pieces of placenta, and place into a clean glass jar. Top off with 100+ proof vodka. Put a clean lid on the jar. Store in a cool, dark area, like a cabinet. Shake daily for at least 6+ weeks until ready.
Set up the capsule machine and get capsules loaded with clean or gloved hands. Put the remaining placenta pieces into the blender. Put the lid on and blend thoroughly until it is all a fine, dry powder. Once it is a powder, pour some onto the capsule machine side with the large capsule halves. Fill each one. Brush any excess back into the blender. Take the covered small capsules side and place on top of the filled side and gently press. Remove. Capsules will be closed. I still take each capsule and hand tighten before placing in jar. Repeat this until all powder has been used. Most placentas will make 100-300 capsules, depending on size.
When done, make sure to clean up and sanitize your area thoroughly. Clean and sanitize the dehydrator, the blender, the capsule machine, the rock, etc. Allow everything to air dry in a clean, open space.

Step five: storage and use
TINCTURE:
Store the tincture in a clean, dry, cool, and dark area - like a kitchen cabinet. Every time you think of it, give it a few good shakes. It takes at least 6 weeks to be ready for use.
Top 10 Benefits of Placenta Tincture
Balance postpartum hormonal fluctuations
Help reduce symptoms of PMS
Soothe indigestion for mom and baby
Decrease insomnia and sleep disorders
Ease childhood infections (rashes)
Reduce colic and teething in baby
Aids in trauma, transition, emotional distress (weaning, growth spurts, etc.)
Stabilize moods
Ease anxiety and emotional distress
Ease cough, stuffy noses, and other cold like ailments
The suggested dosage is 7-10 drops of tincture into a glass of water for the birthing person to drink after the placenta capsules are gone. The suggested dosage of 3-5 drops can be given to a child as needed. It is important to remember a tincture is extremely potent, 1 drop can equal 1 capsule.
PILLS:
Store the pills in a cool, dry, dark area, like a kitchen cabinet. Take as desired, paying attention to your body’s response to the pills. You can use this as a loose guideline as well:
Days 1-5: 2 capsules, 3 times per day
Days 6-10: 2 capsules, 2 times per day
Days 10+: 2 capsules, 1 time per day
General guidelines:
Store in a cool, dry place (not the refrigerator).
You may set aside 10-20 pills for your first postpartum menstrual cycle, these may be stored in the freezer.
Adapt your dosage as needed, this may include taking an extra capsule one day, or skipping a dose
Consider taking with food to reduce the risk of an upset stomach.
Do not take more than 9 capsules in a 24 hour period
In the case of a headache or oversupply, decrease the dosage.
Do not take during times of illness or infection.
When you notice that you are near the end of your supply, gradually decrease in your intake of capsules
After 6 weeks, double bag any remaining capsules and store into a deep freezer to prolong freshness.

Step six: sanitize and return entire kit
Once you have completed this project, please make sure to scrub, wash, and then sanitize each and every piece you used. Make sure that you rinse every item thoroughly before allowing to completely air dry. Once completely dried, you can return to Emily at your next visit. Thank You!


*Emily is not encouraging you to consume your placenta or ensuring that is it safe in any way.
These are basic general guidelines for raw human placenta encapsulation. Proceed at your own risk using your own best judgment.